********************
WINDOW DRESSINGS
You may recall that when we bought the new dining room furniture I immediately went out and bought some material to recover the white seat cushions with.


I had enough material left over to make drapery "side panels", meaning they aren't meant to close, only to frame the windows. Much more up to date with that and the new black metal rods!
Okay let's go on a little journey of drapery making:
It didn't all go smoothly, of course. That would be asking too much of the gods! I got my sewing area all set up: sewing machine and ironing board:
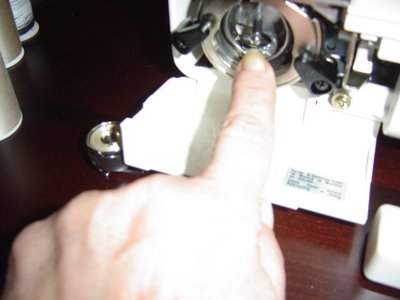
I always take a piece of the fabric as a "test piece" first and try out different tensions and stitch lengths. When I sat down to do that, the bobbin thread jammed so badly that the machine "thunked" loudly, and then wouldn't move. I opened up the bobbin area, took it out and voila, the whole bobbin assembly is bent!

See the little rod the bobbin sits on in there, it is supposed to be straight, it's all bent to the right and down. DAMN!!!!

Okay..... on to Plan B. I have a really old Singer machine from 1974, it was working all along but just sewed funny as it had some thread tension issues. (That's why hubby bought me the new one 5 yrs. ago.) Anyway I decided to pull the old one out and try to to the job with it, just being careful with the tension.

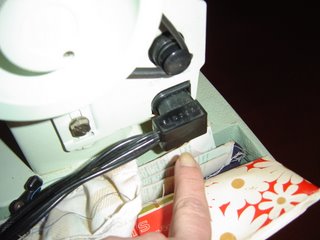
When I plugged it in, no juice. None. No power at all! DOUBLE DAMMIT!!

This set me back a couple of days as it was the weekend and I had to get the new one in for fixing. I'm thinking quite an expense too. However when I was out on Sunday at the cemetary getting pics, hubby came home and decided to check to see if this new machine was getting power. He plugged it back in, and it was working!! I couldn't believe my eyes, the whole bobbin assembly was straight again! So....... did I get some divine intervention here or was this magic?
Anyway it was working again, so Monday I got started.
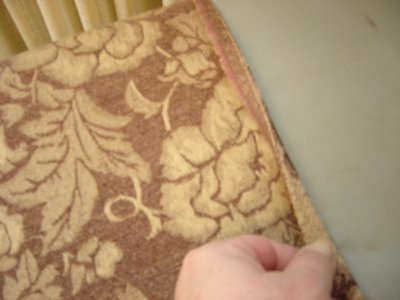
I took each panel (four in all, 2 each for 2 windows; dining room and living room) and ironed one fold over, then another to double it so the material doesn't fray in the wash. Ironing the hems means you don't have to pin them, MUUUUCH easier!
First fold:

Second fold:

Now to sew each side hem:

Now it's time to make the pockets at the top to slide onto the rods. Measuring carefully and ironing the folds:

After sewing the rod pockets at the tops, I hang each panel up to sit on the floor and this time use pins to determine the length:


Then back to the ironing board to press these folds in:

Now to sew the pockets:

And they're up, finials attached, all done!! The whole process from beginning to end all together took me about 9 hours, including measuring and cutting the material to hanging the new curtains and attaching the rod finials. Not too shabby huh?
The before and afters:
BEFORE:


AFTER!
And here in the dining room you can see the colours better:
BEFORE:


AFTER!
It is so nice to FINALLY have my drapery project done! I've had this vision of what I wanted the windows to look like for a very long time now, so it's lovely to actually see it in the rooms when I walk into them!
I didn't hate the old curtains, but this look is so much more "me", and as I mentioned already it's more up-to-date. It also goes much nicer with the new furniture colours as the 2 shades of brown in the new side panels brings it all together. I also think it looks a lot "richer", in colour I mean.
Now the only thing left to do in these rooms is to tear up that ugho carpet and put in wood floors....... anybody have a few thousand bucks they don't need?? Hee Hee
Only a few days left now on my vacation, and I'm all bummed out about having to go back to work. :-( Happens to most of us I know. Now I have a thousand things to do, as I've got company coming over tonight. Have a good day everyone, and take good care of each other!
PEACE
Love Jude
WINDOW DRESSINGS
You may recall that when we bought the new dining room furniture I immediately went out and bought some material to recover the white seat cushions with.


I had enough material left over to make drapery "side panels", meaning they aren't meant to close, only to frame the windows. Much more up to date with that and the new black metal rods!
Okay let's go on a little journey of drapery making:
It didn't all go smoothly, of course. That would be asking too much of the gods! I got my sewing area all set up: sewing machine and ironing board:
I always take a piece of the fabric as a "test piece" first and try out different tensions and stitch lengths. When I sat down to do that, the bobbin thread jammed so badly that the machine "thunked" loudly, and then wouldn't move. I opened up the bobbin area, took it out and voila, the whole bobbin assembly is bent!

See the little rod the bobbin sits on in there, it is supposed to be straight, it's all bent to the right and down. DAMN!!!!

Okay..... on to Plan B. I have a really old Singer machine from 1974, it was working all along but just sewed funny as it had some thread tension issues. (That's why hubby bought me the new one 5 yrs. ago.) Anyway I decided to pull the old one out and try to to the job with it, just being careful with the tension.

When I plugged it in, no juice. None. No power at all! DOUBLE DAMMIT!!

This set me back a couple of days as it was the weekend and I had to get the new one in for fixing. I'm thinking quite an expense too. However when I was out on Sunday at the cemetary getting pics, hubby came home and decided to check to see if this new machine was getting power. He plugged it back in, and it was working!! I couldn't believe my eyes, the whole bobbin assembly was straight again! So....... did I get some divine intervention here or was this magic?
Anyway it was working again, so Monday I got started.
I took each panel (four in all, 2 each for 2 windows; dining room and living room) and ironed one fold over, then another to double it so the material doesn't fray in the wash. Ironing the hems means you don't have to pin them, MUUUUCH easier!
First fold:

Second fold:

Now to sew each side hem:

Now it's time to make the pockets at the top to slide onto the rods. Measuring carefully and ironing the folds:
After sewing the rod pockets at the tops, I hang each panel up to sit on the floor and this time use pins to determine the length:
Then back to the ironing board to press these folds in:
Now to sew the pockets:
And they're up, finials attached, all done!! The whole process from beginning to end all together took me about 9 hours, including measuring and cutting the material to hanging the new curtains and attaching the rod finials. Not too shabby huh?
The before and afters:
BEFORE:
AFTER!
And here in the dining room you can see the colours better:
BEFORE:
AFTER!
It is so nice to FINALLY have my drapery project done! I've had this vision of what I wanted the windows to look like for a very long time now, so it's lovely to actually see it in the rooms when I walk into them!
I didn't hate the old curtains, but this look is so much more "me", and as I mentioned already it's more up-to-date. It also goes much nicer with the new furniture colours as the 2 shades of brown in the new side panels brings it all together. I also think it looks a lot "richer", in colour I mean.
Now the only thing left to do in these rooms is to tear up that ugho carpet and put in wood floors....... anybody have a few thousand bucks they don't need?? Hee Hee
Only a few days left now on my vacation, and I'm all bummed out about having to go back to work. :-( Happens to most of us I know. Now I have a thousand things to do, as I've got company coming over tonight. Have a good day everyone, and take good care of each other!
PEACE
Love Jude


0 Comments:
Post a Comment
<< Home